

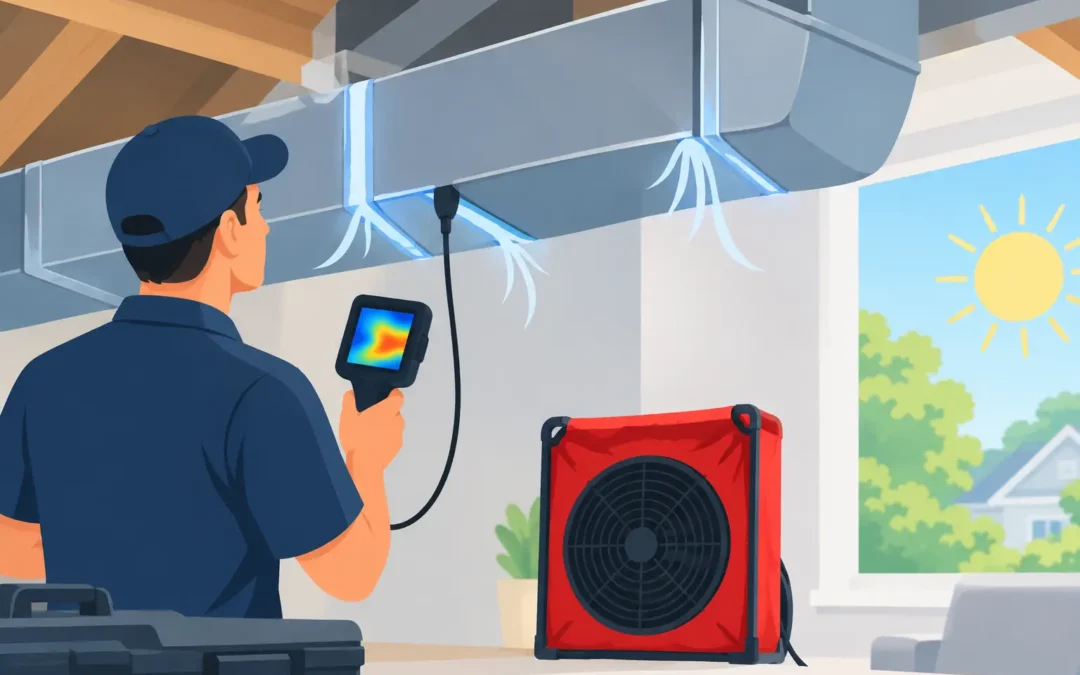
A second-floor bedroom that stays hot while the thermostat runs nonstop is often more than an insulation problem. Leaky ducts can release cooled air into a scorching attic, pull dusty attic air into the system, and make your HVAC equipment work harder than it should. Learning how to test duct leakage helps you recognize warning signs, perform a few safe homeowner checks, and decide when measured professional testing is the better next step.
In Southern California, duct problems are especially common in homes with attic-installed HVAC systems. High attic temperatures, older tape repairs, rodent activity, crushed flexible ducts, and disconnected joints can all affect comfort, indoor air quality, and utility costs.
What Duct Leakage Means for Your Home
Your ducts are the pathways that carry conditioned air from the HVAC equipment to each room and return indoor air to be heated or cooled again. Supply ducts push conditioned air out. Return ducts pull air back to the system. Leaks in either side cause problems, but return-side leaks can be particularly concerning because they may draw attic dust, insulation fibers, rodent debris, or other contaminants into the air stream.
A small amount of duct leakage may not be noticeable room to room. Larger leaks, disconnected runs, and damaged return ducts can produce obvious symptoms: weak airflow at vents, rooms that never reach the thermostat setting, dusty indoor surfaces, unusually high bills, or musty odors when the system turns on.
Duct leakage is not always the only cause. Inadequate insulation, poor attic ventilation, an oversized or undersized HVAC system, dirty filters, blocked registers, and air leaks in the home itself can create similar comfort complaints. That is why a proper assessment considers the entire attic and home-performance system instead of sealing a visible duct joint and assuming the job is done.
How to Test Duct Leakage With Safe Home Checks
Homeowner checks can reveal whether a professional evaluation is warranted. They cannot measure total leakage accurately, and they should never require you to disturb damaged insulation, walk unsafe attic framing, or handle HVAC electrical components.
Start with the symptoms inside the living space
Turn on the cooling or heating system and let it run for several minutes. Walk through the home and compare airflow at supply registers. One weak vent does not automatically mean a duct leak, since a closed damper, blocked register, or poorly balanced system may be involved. But several weak vents, especially in rooms farthest from the air handler, deserve attention.
Notice whether certain rooms are consistently hotter or colder than the rest of the home. Also watch for a system that runs for long periods without delivering steady comfort. If you see dust streaks around ceiling registers or experience odors only when the HVAC runs, a return-duct leak or contamination issue may be contributing.
Inspect accessible duct connections
If your attic is safely accessible and has a solid walkway, use a bright flashlight to inspect only the areas you can reach without stepping between ceiling joists. Look around the air handler, main trunk lines, and visible branch ducts. You may find disconnected ducts, sagging flexible ducts, torn insulation jackets, crushed sections, loose boots at ceiling registers, or old tape peeling away from joints.
Pay close attention to ducts that pass near areas with rodent evidence. Droppings, nesting material, chewed duct insulation, or contaminated attic insulation can turn a simple airflow repair into a broader cleanup and remediation project. Avoid disturbing these materials without proper protection and containment practices.
Do not rely on standard cloth-backed duct tape. Despite its name, it often dries out and fails in attic heat. Professional duct repairs typically use approved mastic, appropriate mesh reinforcement where needed, and properly rated foil tape for specific connections. The correct repair depends on the duct material, damage, accessibility, and local code requirements.
Use a tissue test around accessible joints
With the HVAC blower running, hold a lightweight tissue near an accessible duct seam, connection, or register boot. Keep the tissue clear of moving parts and do not place it inside the duct. Air blowing the tissue away from a supply connection may indicate escaping conditioned air. If the tissue pulls toward a return-side connection, that may suggest the duct is drawing air in.
This test is useful for finding larger, exposed leaks. It will not identify leakage hidden beneath insulation, inside walls, or in inaccessible attic sections. A lack of movement does not prove the duct system is tight.
Watch for temperature changes near ducts
An infrared thermometer can help identify obvious temperature differences along accessible supply ducts while the system is operating. A cold supply duct in a hot attic is normal during cooling, but dramatic temperature changes near a damaged joint, disconnected section, or missing insulation may point to a problem.
Use the readings as clues, not as a final diagnosis. Infrared tools can be affected by shiny surfaces, insulation coverings, and the temperature of surrounding materials. They cannot calculate how much air the duct system is losing.
Why Smoke Tests Need Caution
Homeowners sometimes use incense or smoke pencils to look for air movement. This can be helpful around accessible register boots or duct seams, but it requires care. Do not use open flames in an attic, near insulation, around gas equipment, or near suspected rodent contamination. Never introduce smoke into a duct system yourself.
Smoke movement can also be misleading. Attics have natural air currents caused by heat, vents, and pressure differences. A smoke test may reveal movement around a joint without showing whether the HVAC duct itself is leaking. For homes with combustion appliances, backdrafting concerns, mold, or significant attic contamination, professional testing is the safer choice.
The Most Accurate Way to Test Duct Leakage
A professional duct leakage test uses a calibrated duct blaster. The technician temporarily seals the registers and connects the testing equipment to the duct system. The equipment pressurizes or depressurizes the ducts to a controlled level and measures how much air is escaping.
This process provides measurable results rather than guesswork. It can help identify whether leakage is minor, moderate, or severe, and it gives the contractor a baseline for confirming repairs afterward. In some projects, duct testing may also be needed to support code compliance or permit requirements.
A thorough inspection should not stop at the test number. The technician should locate accessible defects, evaluate duct insulation and support, inspect for disconnected or damaged runs, and assess whether attic conditions are contributing to the failure. For example, sealing a return duct is valuable, but the home may also need contaminated insulation removal, rodent proofing, air sealing, or improved attic ventilation to protect the repair long term.
When Duct Repair Is Worth It
Professional repair is usually worthwhile when you have major comfort differences, high cooling bills, visible duct damage, loose connections, or signs that attic air is entering the system. It is also a smart investment before adding new insulation. Insulating over damaged ducts can hide the problem and make future access more difficult.
The repair approach depends on the condition of the system. Minor accessible leaks may be sealed and reinsulated. Sagging flex duct may need proper support to restore airflow. Torn, crushed, undersized, contaminated, or deteriorated ductwork may be better replaced than patched. Older systems with widespread damage often benefit more from a planned duct replacement than a series of temporary repairs.
If rodent-contaminated insulation, mold, or moisture is present, address those conditions as part of the project. A clean, dry, properly sealed attic helps protect both the duct system and the air your family breathes.
Do Not Overlook the Return Ducts
Homeowners naturally focus on the cool air coming from supply vents, but return ducts deserve equal attention. Leaky returns can pull unconditioned attic air into the HVAC system. That can reduce efficiency, increase dust, and create pressure conditions that draw outdoor air through gaps elsewhere in the home.
Return problems are not always visible. A return chase may be hidden in a wall or framed cavity, and older homes sometimes have return pathways that need careful evaluation. A licensed home-performance contractor can identify whether the issue is a duct connection, a poorly sealed chase, inadequate return capacity, or a combination of factors.
Protect Comfort Before the Next Heat Wave
A tissue test and visual inspection can help you spot obvious duct failures, but they cannot replace calibrated testing or a full attic assessment. If your home has uneven temperatures, unexplained HVAC costs, dusty airflow, or damaged attic ducts, have the system evaluated before peak summer heat puts more strain on it.
The Attic Insulation Specialists Inc. can assess ductwork alongside insulation, attic cleanliness, rodent activity, air sealing, moisture, and ventilation so the repair protects the whole home, not just one visible seam. A properly sealed and supported duct system gives your HVAC equipment a fair chance to keep your family comfortable, your indoor air cleaner, and your energy use under control.