
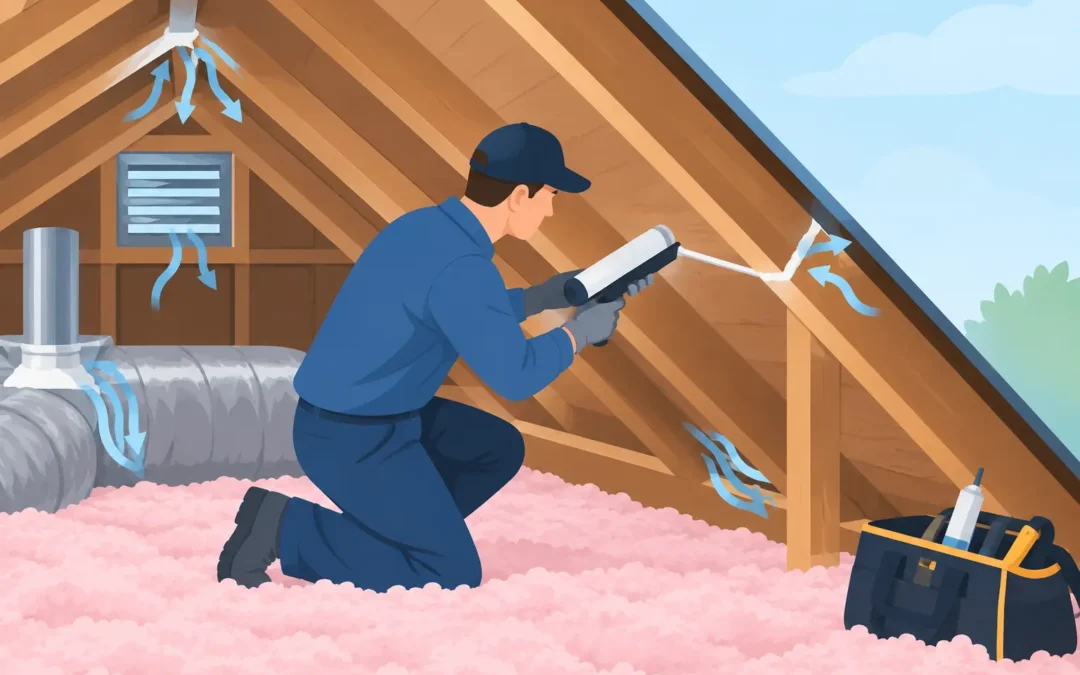
A hot upstairs bedroom, dusty rooms, and an air conditioner that seems to run without relief often point to the same hidden issue: gaps between the living space and the attic. Learning how to air seal attic areas means stopping uncontrolled airflow at its source, before adding more insulation or replacing equipment that may not be the real problem.
In Southern California, attic air sealing is about more than keeping conditioned air indoors. It can help limit the movement of attic dust, insulation fibers, rodent odors, and outdoor pollutants into living areas. Done correctly, it also allows insulation and ventilation to perform as intended, helping protect comfort, indoor air quality, and long-term energy costs.
What attic air sealing actually does
Your attic is usually outside the home’s conditioned envelope. The ceiling below it should act as the boundary between cooled or heated rooms and the unconditioned attic. When that ceiling plane has openings, air moves through them because of temperature differences, wind pressure, and HVAC operation.
Warm attic air can enter the home through recessed lights, ceiling penetrations, and wall-top gaps. At the same time, conditioned air escapes upward through those same openings. Insulation slows heat transfer, but it does not reliably stop moving air. That is why adding insulation over unsealed gaps can leave a home uncomfortable and can conceal problems that should have been corrected first.
Air sealing is the process of closing those openings with materials suited to the size, location, and temperature exposure of each gap. The goal is not to make an attic airtight at every surface. The goal is to create a continuous, durable air barrier at the ceiling plane while preserving required ventilation and safe clearances around heat-producing fixtures.
Start with an attic inspection, not a caulk gun
The most productive way to air seal an attic is to identify the full path of air leakage before applying materials. A quick look from the attic hatch may reveal obvious openings, but many of the most significant leaks are buried under insulation, located at partition walls, or hidden around mechanical systems.
Before work begins, inspect for signs that change the scope of the project. Rodent droppings, damaged ductwork, wet insulation, roof leaks, mold growth, or deteriorated wiring should be addressed before air sealing. Sealing over contaminated insulation or moisture damage does not protect the home. It can trap odors, leave health concerns unresolved, and make later repairs more difficult.
A professional inspection can also distinguish between air leaks and ventilation features. Soffit vents, ridge vents, gable vents, and properly designed attic ventilation pathways should not be blocked in an effort to stop drafts. Air sealing belongs at the ceiling below the attic. Ventilation belongs at the roof and eaves, where it helps manage attic heat and moisture.
Find the leakage points that matter most
The largest attic leaks are frequently at framing transitions and service penetrations, not just around the attic hatch. Insulation often hides these areas, so it may need to be carefully pulled back and later restored or replaced.
Common problem areas include plumbing stacks, electrical cables, bathroom exhaust ducts, furnace flues, chimney chases, recessed light housings, open wall cavities, and gaps around duct boots. Attic access panels and pull-down stairs are also frequent weak points because they are used regularly and may have no weatherstripping or insulated cover.
Pay close attention to dropped soffits over kitchens or hallways. These framed boxes often create open pathways from the attic into the home. The same is true of walls that separate a garage from living space. Gaps in these locations can allow garage odors, vehicle fumes, and dust to enter wall and ceiling cavities, so they deserve careful treatment.
In homes with older insulation, darkened fiberglass is another clue. Dust staining can indicate that air has been moving through the insulation for years. The staining itself is not proof of a health hazard, but it is a useful signal that the air barrier below may be incomplete.
Choose sealing materials based on the gap and safety requirements
Different openings need different materials. Small, stable gaps around wiring or framing can often be sealed with appropriate caulk. Larger irregular openings may require low-expansion spray foam, rigid blocking sealed at the edges, or a combination of materials. The repair must remain secure as the home expands and contracts with seasonal temperature changes.
Heat-producing components require more caution. Openings around chimneys, metal flues, and certain light fixtures may need noncombustible metal flashing and fire-rated sealants rather than standard foam. Clearance requirements vary by fixture and vent type. Applying foam against an item that requires an air gap can create a fire risk and may violate code.
Recessed lights need special attention. Older fixtures may not be rated for direct insulation contact, while newer IC-rated and airtight models are designed differently. A homeowner should verify the fixture labeling and local requirements before covering or sealing around any recessed light. When there is uncertainty, an electrician or qualified attic professional should evaluate the condition.
Bathroom fans and kitchen exhaust systems should vent outdoors through properly connected, insulated ducting. Do not seal a fan duct where it ends in the attic. That sends moisture into the attic space, where it can contribute to condensation, mold, and wood damage.
How to air seal attic access points and penetrations
Once the attic is clean, dry, and safe to enter, the work generally begins at the most accessible ceiling-plane openings. Insulation is moved aside carefully rather than compressed or discarded. Each opening is cleaned of loose debris so the selected sealant can adhere properly.
For small penetrations, apply a continuous bead of sealant around the gap. For larger openings, install a solid backing or blocking material first, then seal every edge. The repair should prevent airflow from bypassing the material. Simply filling the center of a large hole while leaving the perimeter open will not solve the problem.
An attic hatch should close against durable weatherstripping on all four sides. The top side of the hatch also needs insulation, secured so it remains in place when the hatch is opened. Pull-down stairs often benefit from a fitted, insulated attic-stair cover that seals at the ceiling opening. This is one of the more noticeable comfort improvements in homes where the access point is located in a hallway or garage ceiling.
After the leaks are sealed, insulation should be returned to an even depth without blocking soffit ventilation. If insulation is contaminated by rodents, moisture, or mold, replacement may be safer than attempting to reuse it. Proper air sealing and clean insulation work together. One cannot fully compensate for the other.
Do not overlook ducts, pressure issues, and moisture
Attic air sealing improves the building envelope, but it does not repair leaky HVAC ducts. Supply ducts with loose connections can dump cooled air into a hot attic. Return leaks can pull dusty attic air into the HVAC system. Both problems can raise bills, reduce comfort, and place unnecessary strain on heating and cooling equipment.
Pressure imbalances inside the home matter as well. Powerful kitchen hoods, bath fans, dryers, and poorly balanced HVAC systems can draw replacement air through attic leaks. Sealing the ceiling plane reduces those pathways, but a whole-home assessment may be needed when rooms remain stuffy, doors slam, or odors appear when exhaust fans are running.
Moisture calls for the same careful approach. Southern California homes can still develop attic condensation from bathroom exhaust leaks, roof failures, duct sweating, or indoor humidity. Air sealing should never be used to hide water staining or mold. Identify the moisture source first, correct it, and confirm that the attic has the ventilation and drainage conditions needed to stay dry.
When professional attic air sealing is the safer choice
A small, visible gap around a pipe may be a reasonable homeowner repair. A full attic air-sealing project is different, especially when insulation is old, access is limited, electrical conditions are unclear, or signs of pests and moisture are present.
Professional service is particularly valuable when work involves contaminated insulation removal, rodent proofing, mold remediation, combustion vents, recessed lighting, complex ductwork, or inaccessible framing cavities. Licensed, insured contractors can evaluate the attic as a connected system instead of treating each draft as an isolated problem. That approach helps avoid common mistakes, such as sealing required vents, burying unsafe fixtures, or installing new insulation over active contamination.
For homeowners in Los Angeles, Orange, Ventura, Riverside, and San Bernardino counties, The Attic Insulation Specialists Inc. can assess air leakage alongside insulation condition, duct performance, pest activity, ventilation, and moisture risk. The right scope depends on what the attic is telling you, not on a one-size-fits-all package.
A properly sealed attic should not be something you notice every day. You notice the result instead: rooms that hold their temperature longer, less dust drifting through the home, and an HVAC system that does not have to fight an invisible leak above the ceiling.